AWSEC2SSLNode.jsLoad Balancer
How to Apply SSL for HTTPS to Node Express API in AWS EC2
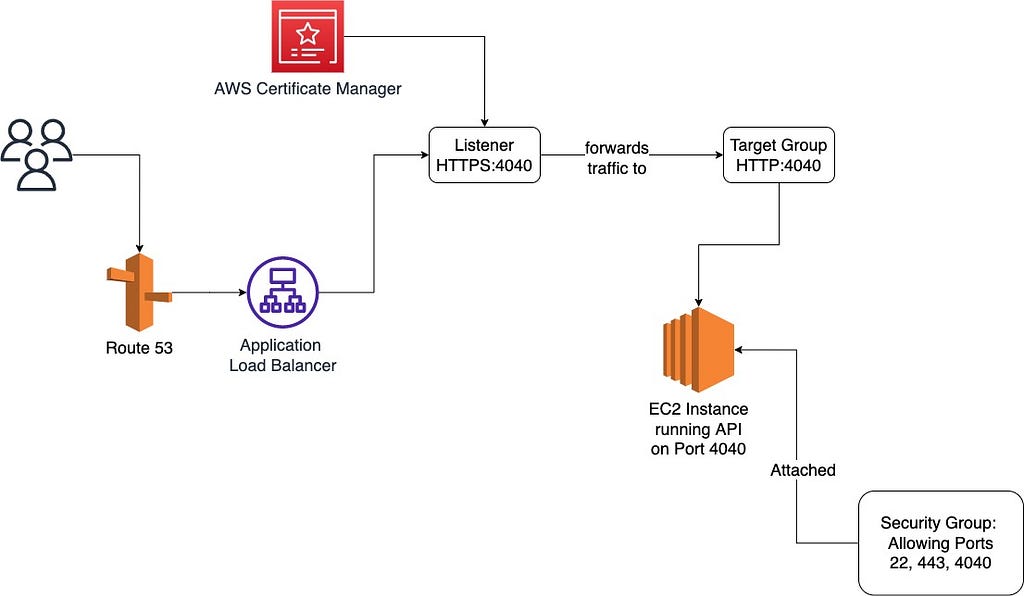
You've deployed your Node Express API to an AWS EC2 instance and it's accessible over HTTP. Now you need HTTPS. This guide walks through adding SSL using an Application Load Balancer, Route 53, and AWS Certificate Manager.
Pre-requisites: You should already have a Node Express API running on an EC2 instance. If you don't, check out my guide on deploying a Node API to EC2 Ubuntu first.
Step 1: Register Domain Name Using Route 53
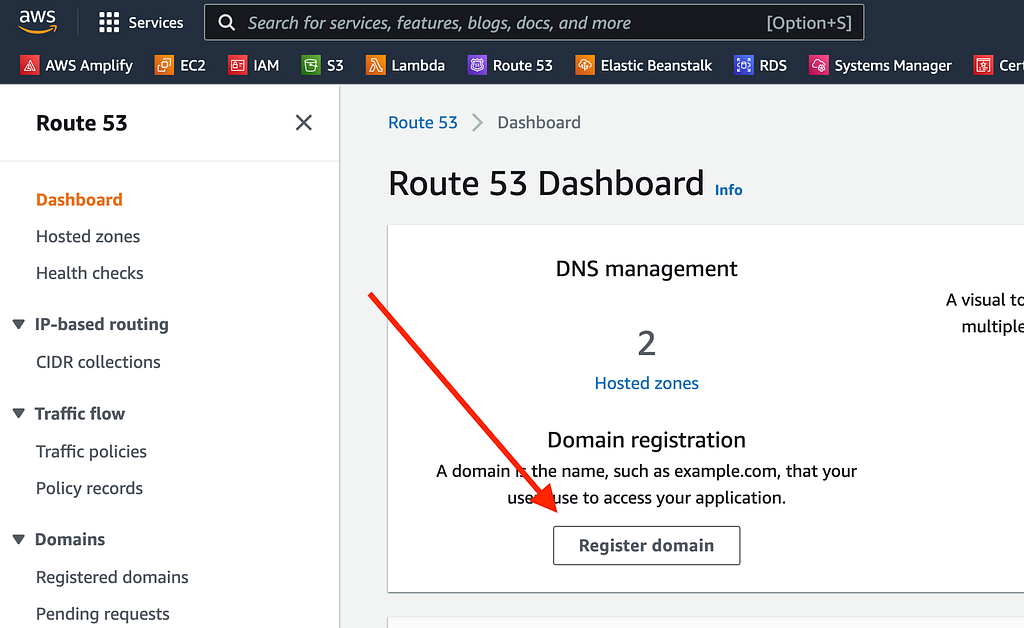
- Navigate to the Route 53 service in AWS
- Click "Register domain"
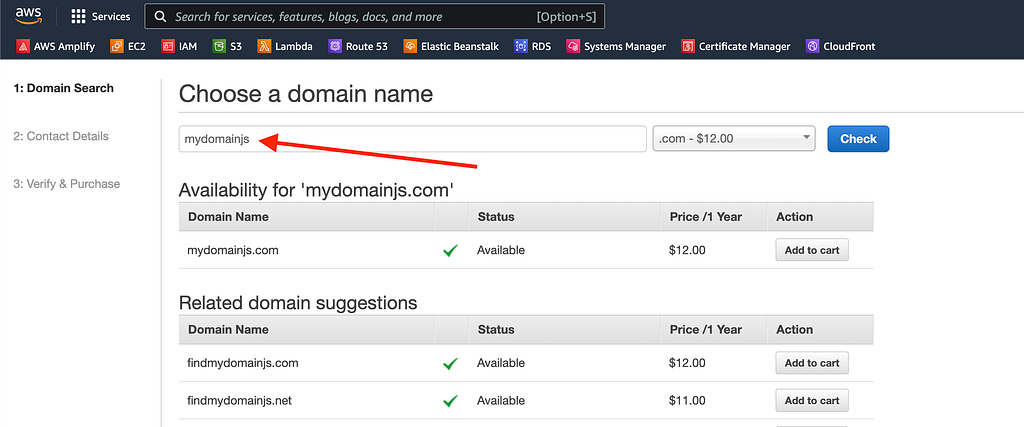
- Search for an available domain (e.g.,
mydomainjs.com) - Complete the purchase process
- Wait for domain registration to finalize before moving on — this can take a few minutes to an hour
Step 2: Generate SSL Certificate from Certificate Manager
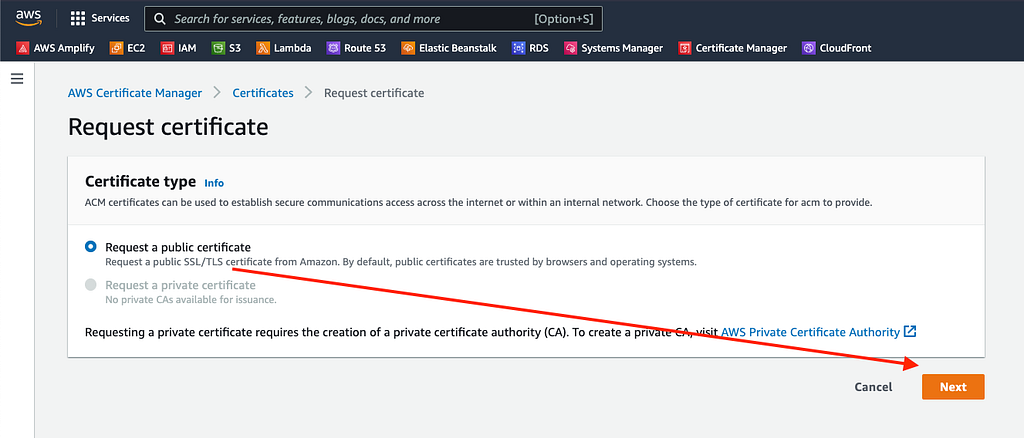
- Open AWS Certificate Manager
- Click "Request a certificate" → "Request a public certificate"
- Add domain variations to cover all cases:
yourdomain.com
*.yourdomain.com
www.yourdomain.com
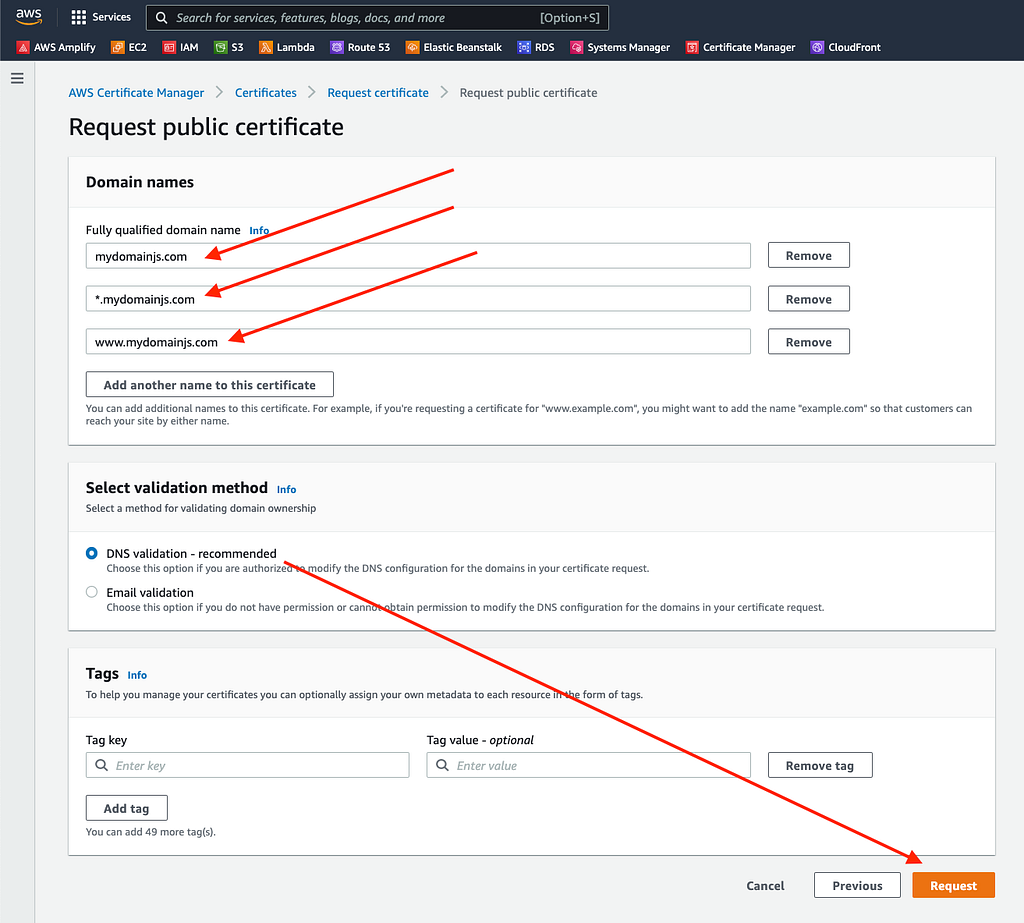
- Submit the request
- Note: Certificate generation typically takes around 30 minutes
Step 3: Create Application Load Balancer (ALB)
Initial Setup
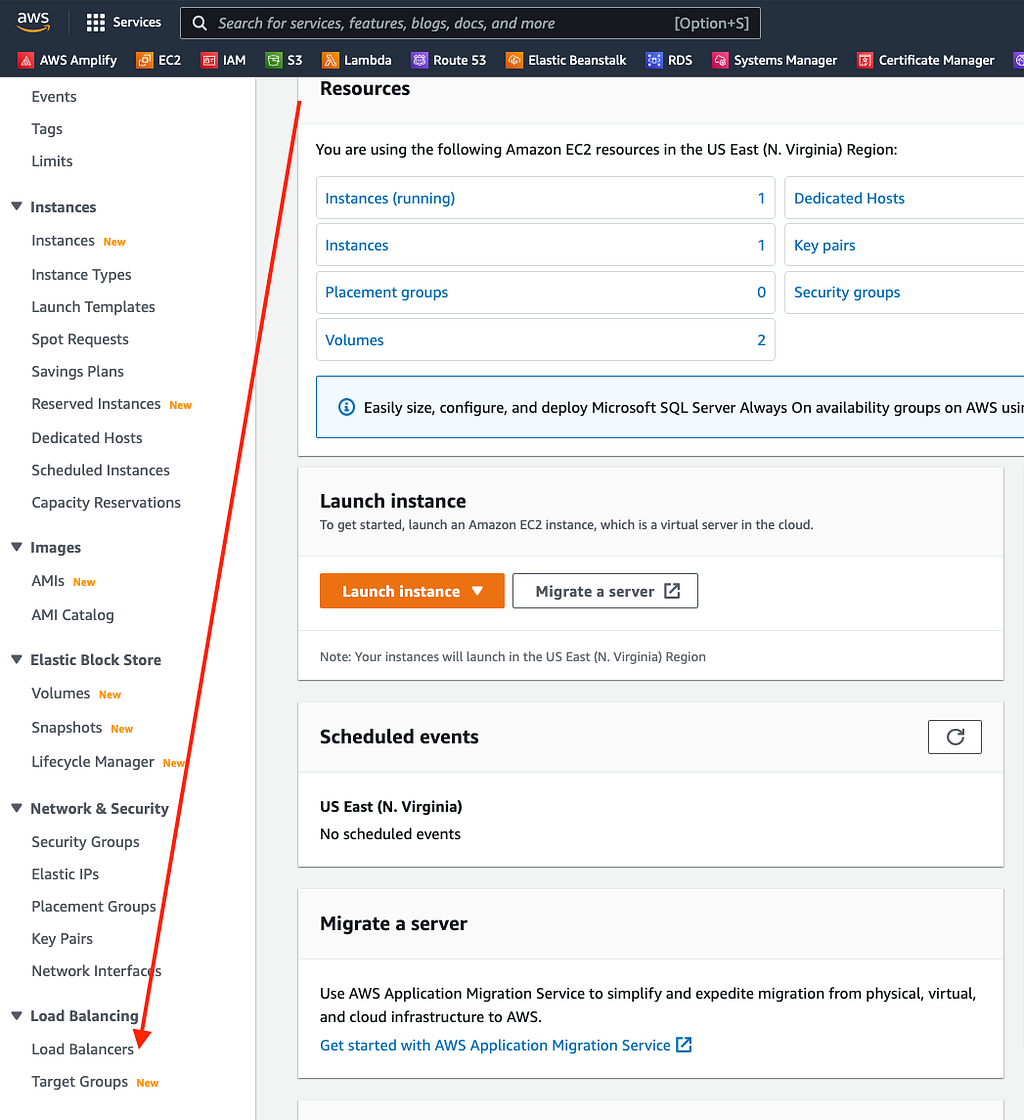
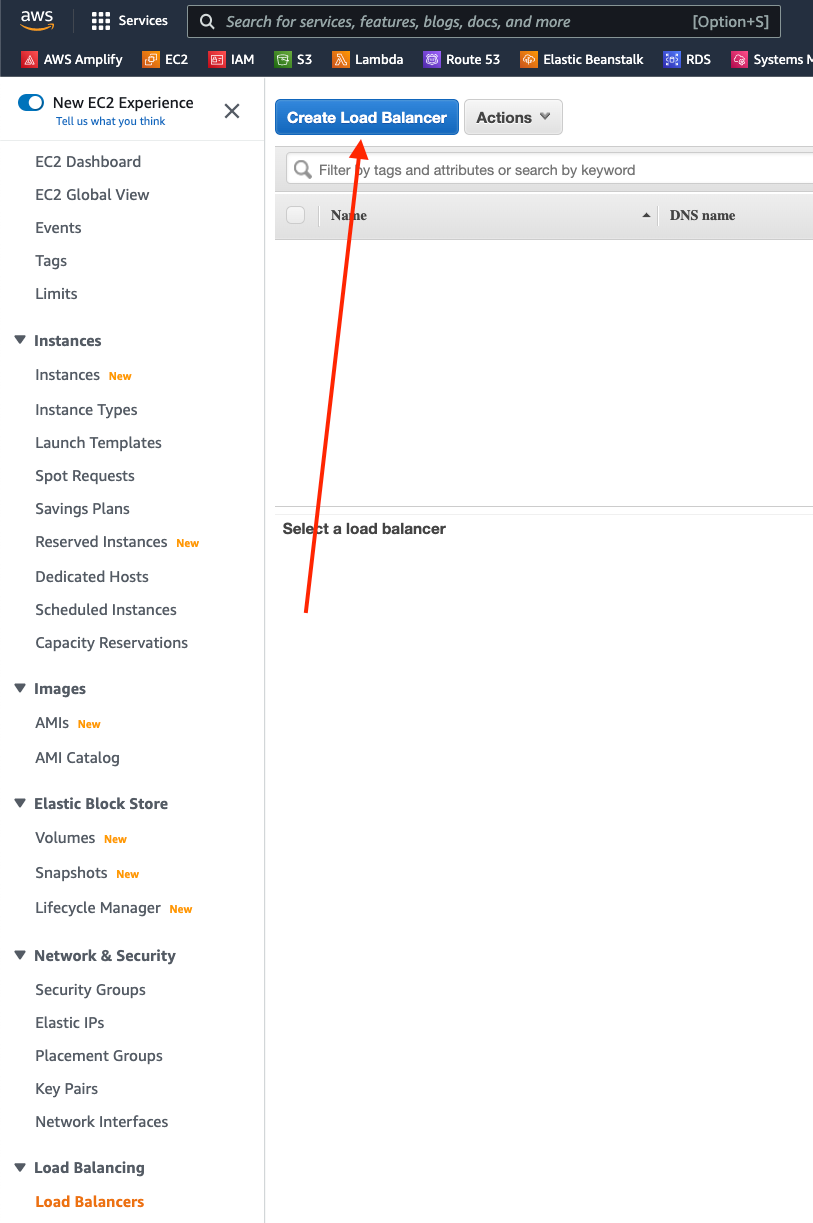
- Navigate to EC2 → Load Balancers
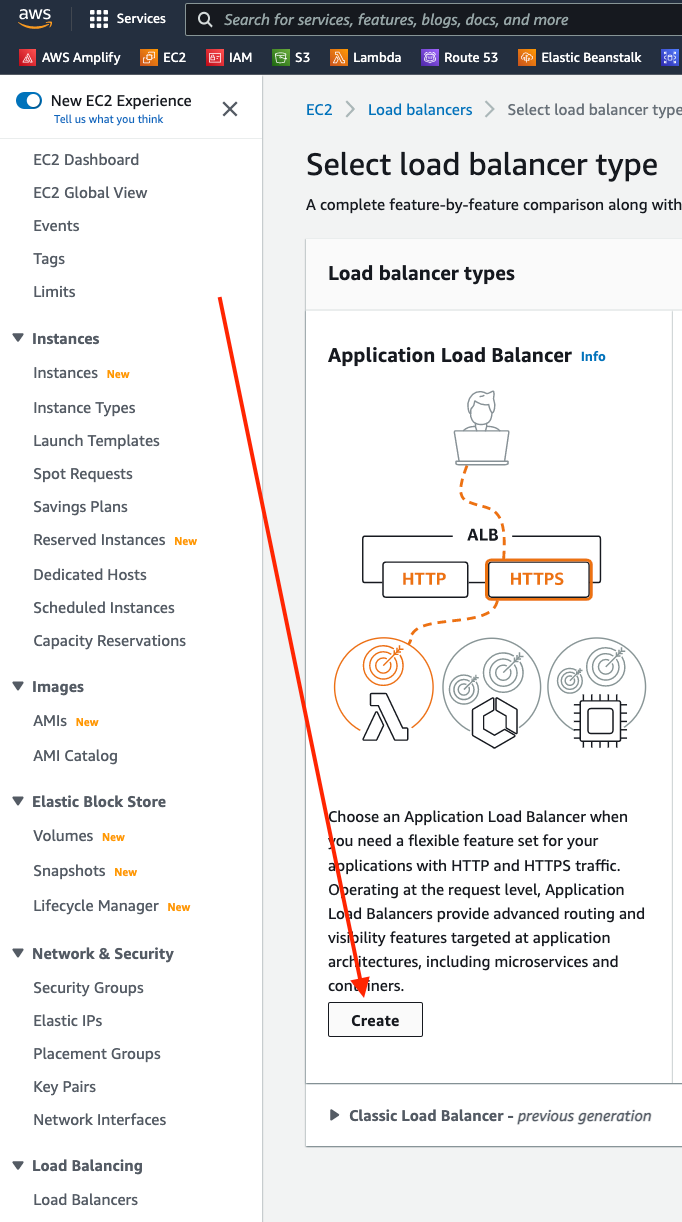
- Click "Create Load Balancer" and select Application Load Balancer
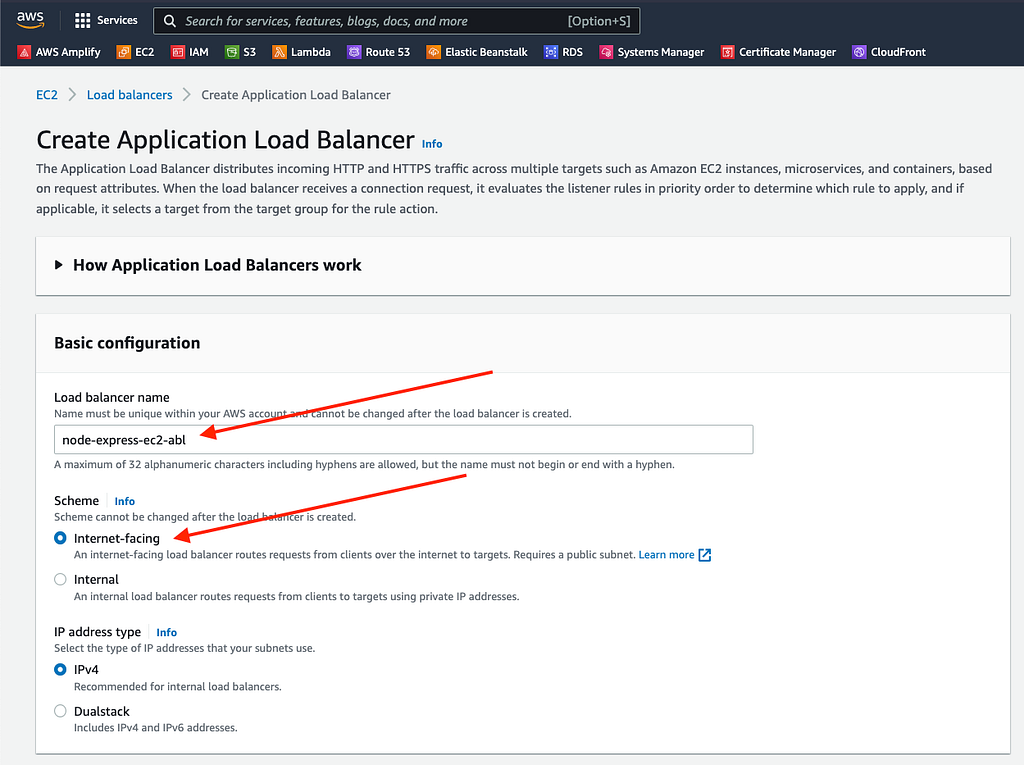
- Assign a descriptive name
- Keep default settings

- Under Network Mapping, select at least 2 availability zones
Target Group Configuration


- Create a new target group using HTTP protocol
- Specify the port your Node API listens on (e.g.,
5001)

- Select the EC2 instance running your API
- Click "Include as Pending below"
- Finish creating the target group
Complete ALB Setup

- Return to the ALB creation form
- Refresh the target group dropdown and select your newly created group
- Under Listeners, add HTTPS (443) and attach your SSL certificate

- Click "Create Load Balancer"
Security Group Configuration


- After the ALB is created, click "Edit Security Groups"
- Select the same security group you configured for your EC2 instance
- This ensures the ALB and EC2 instance share the same port access rules
Step 4: Configure Route 53 to Route Traffic to ALB

- Select your registered domain in Route 53
- Click "Create Record" → choose "Simple Routing" → "Define Simple Record"
- Configure the A record:
- Record type: A
- Route traffic to: Application and Classic Load Balancer
- Region: same region as your EC2 and ALB
- Select your ALB from the dropdown
- Create an AAAA record with the same settings for IPv6 support

Result

Your domain now routes traffic through the Application Load Balancer to your EC2 instance over HTTPS. The ALB handles SSL termination, so your Express API continues running on HTTP internally — no changes needed to your Node code.